Simple Ways the Arts Can Help Make Algebraic Concepts Easier
4 Min Read • Arts Integration
If I had to choose the most difficult 3rd-grade math chapter of my year, it has to be Chapter 9: Properties and Equations. It is in this chapter when I really find out how deep my students’ number sense is and how well they are able to think abstractly. Of course, whenever a concept is abstract, developmentally it is most appropriate to find a way to make it concrete for students so that they can visualize the concepts. Integrating the arts can do just that!
Integrating the arts with algebraic concepts
First, students need to understand the concept of a seesaw or teeter-totter. Every year this seems less familiar to my students because they are not common on playgrounds anymore. I share a video clip or two so we have a frame of reference, and this helps to bring up some vocabulary words such as balance, equal, and possibly even symmetry. Then, I read aloud Balancing Act by Ellen Stoll Walsh. My students are above the target age for this book, but I tell them that I like to make sure we all have a solid understanding of the foundations of the concept of balance.
Visually Representing Equations with Art
Depending on your grade level expectations, this book could be the inspiration for your arts integrated lesson. Students can examine the artwork on each page of the book, and create their own collage, visually demonstrating a balanced (or unbalanced) see-saw. Provide students with their pivot point, which is a triangle for the board to balance on. I have students draw an equal sign on the balance if it is balanced, or a greater than/less than sign on the pivot point if it is not balanced. Prior to sharing expectations for the visual collage, allow students to explore measuring with balances. (If needed, make a simple balance as described here.)

Relate this to the idea of balance in visual art. According to the J. Paul Getty Museum, balance is defined as “…the distribution of the visual weight of objects, colors, texture, and space. If the design was a scale, these elements should be balanced to make a design feel stable. In symmetrical balance, the elements used on one side of the design are similar to those on the other side.”
What great common vocabulary to discuss! Share a few masterpieces that demonstrate visual balance. Then, allow students to create a collage. Here is an example of a teacher that had students create this with paper tiles. However, students could also create a collage that is constructed from more organic shapes that they cut or tear. The only requirement is that the seesaw visually represents the “weight” on each side, either with size or repetition of similar sized items.
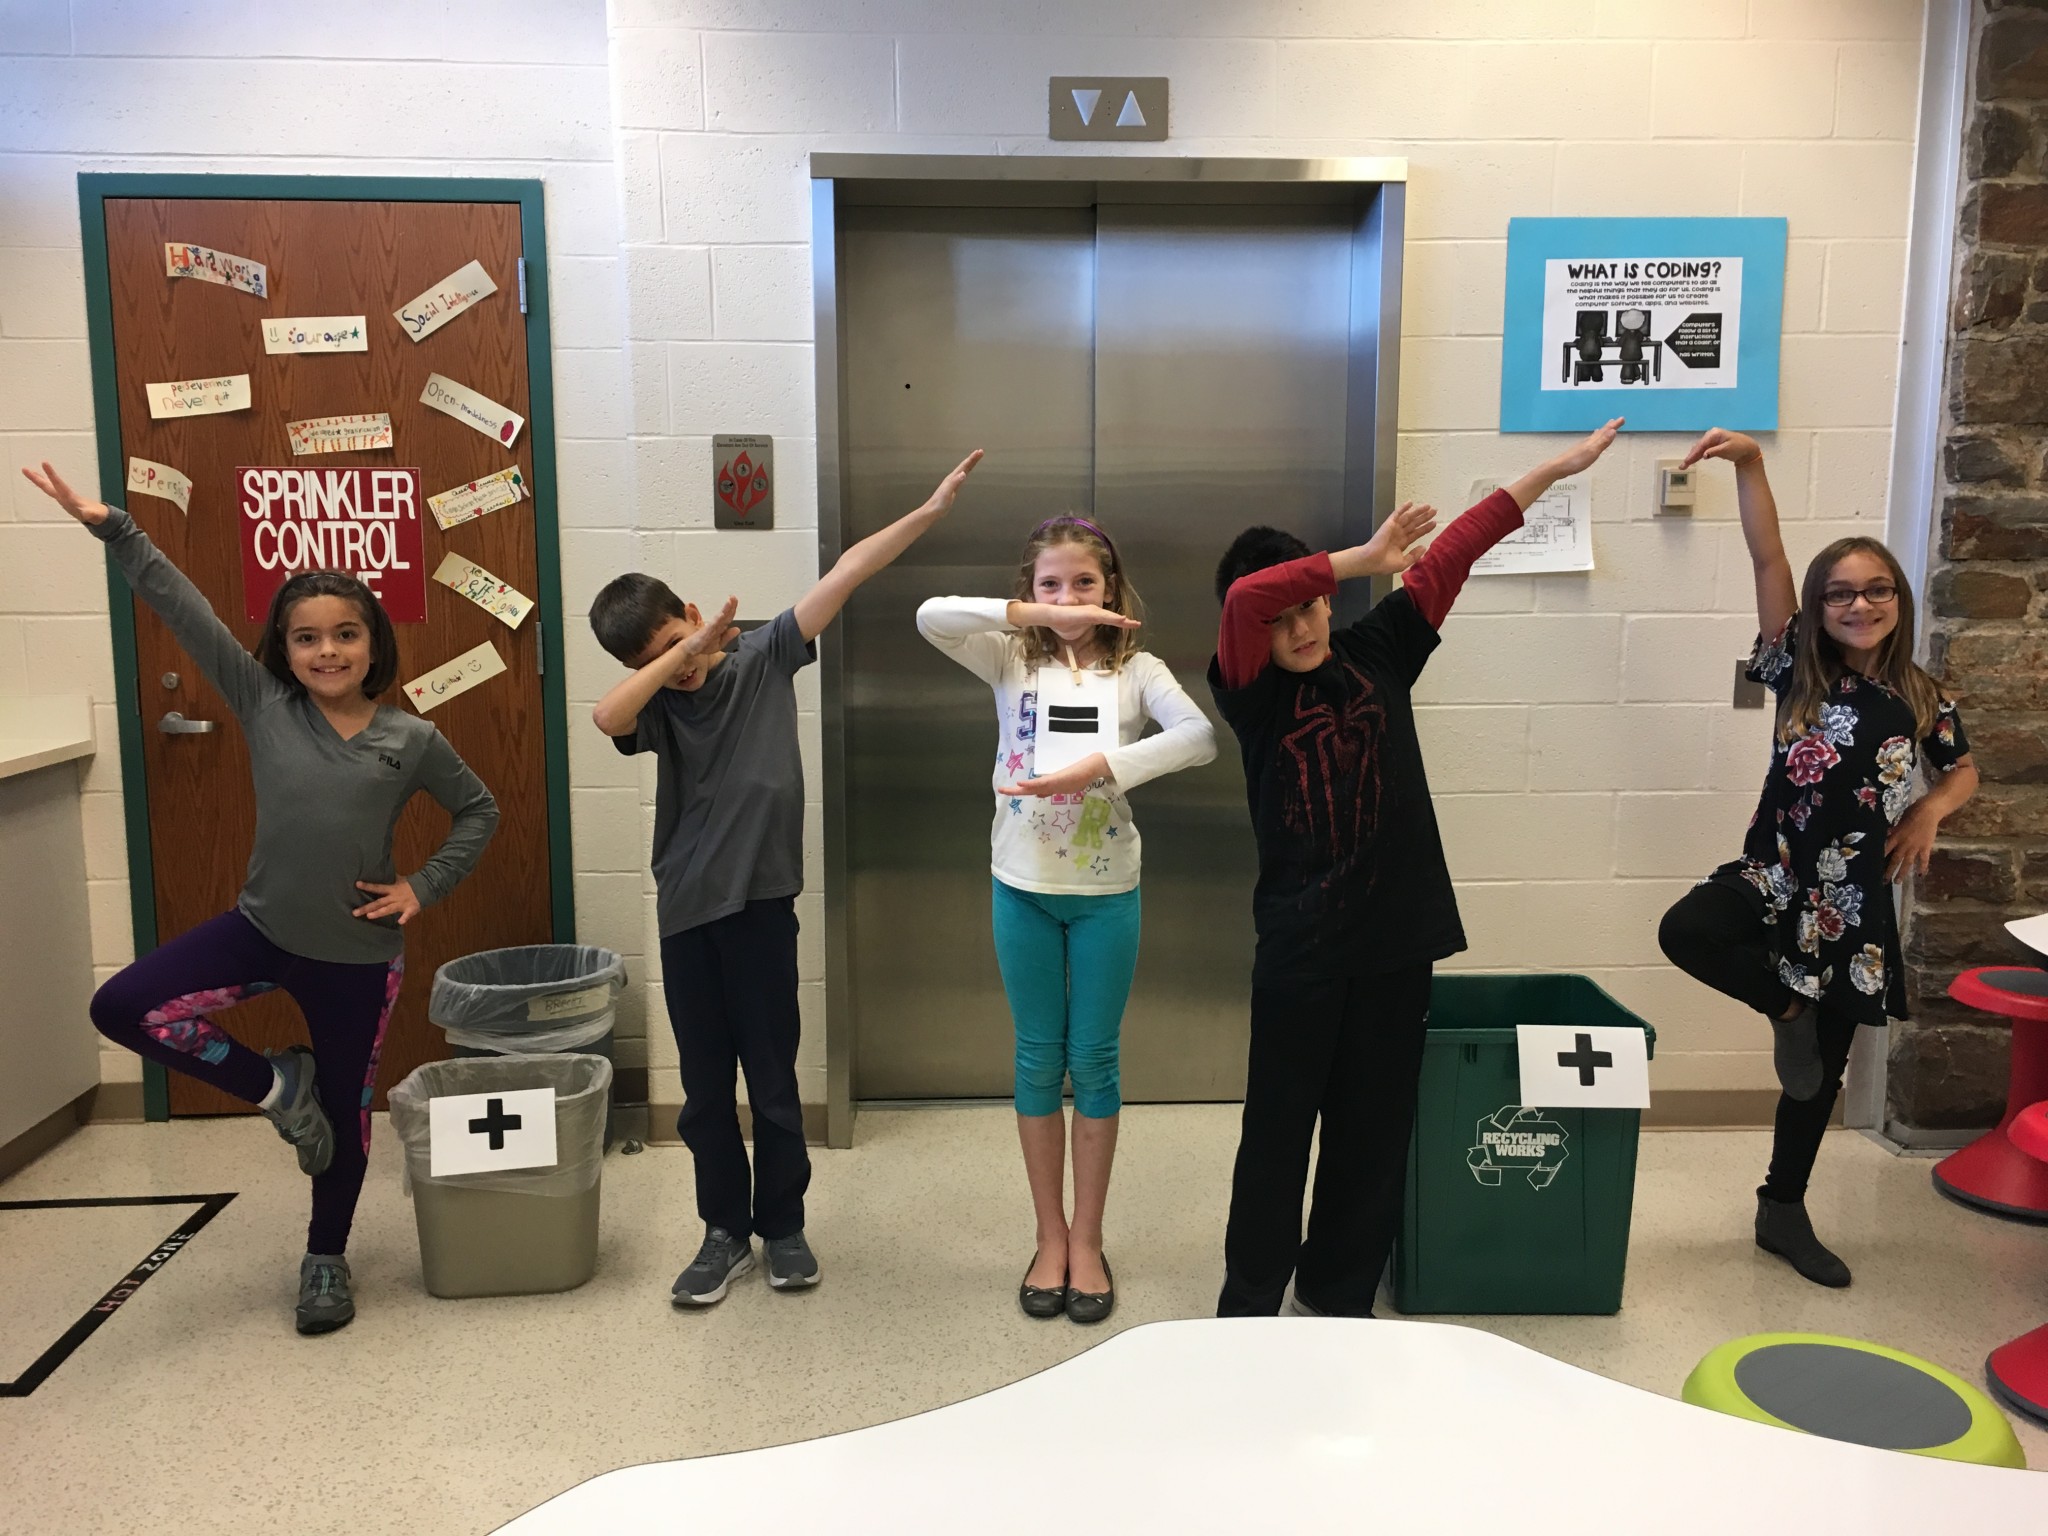
Visually Representing Equations with Dance
Demonstrate the commutative and associative properties through small group dance. The commutative property of addition states that the order of the addends does not change the sum. Therefore, 3 + 4 = 7, and 4 + 3 = 7. We can also write that as 3 + 4 = 4 + 3, or have students solve for an unknown in an equation such as this: 3 + 4 = a + 3.
Dance can help visually represent this. In small groups, students can replace the numbers with dance poses to create a “picture” or “freeze frame”, similar to tableaux. This is a great opportunity to integrate the Elements of Dance. This activity falls under “body”, which refers to the dancer’s body as the mobile figure or shape. In groups of four, have students create two poses, pose A and pose B, that they will use. Then, have them freeze frame a commutative equation for the class: Pose A + Pose B = Pose B + Pose A. I have students stand in front of our whiteboard and position their bodies so that the plus signs and equals sign falls in the correct place. (Find more information on teaching the elements of dance here.)
Tangible Strategies
The process is similar for the associative property of addition, which states that it doesn’t matter how you group addends, the sum is still the same. This time, you will need groups of 6 so that you can have three students on each side of the equals sign. (Pose A + Pose B) + Pose C = Pose A + (Pose B + Pose C). On the left side of the equation, Pose A and Pose B should find a way to intertwine or link their pose, and on the right side of the equation Pose B and C should link their pose. This demonstrates that we still have the same poses on each side, they are just grouped differently.
Using these tangible strategies helps to create a solid mathematical foundation in algebraic concepts. Then, when students are presented with directions to “write an equation with a variable for the unknown and solve following Order of Operations”, like in my challenging chapter 9, we are ready to go!