Documenting Learning with Hallway Displays
5 Min Read • Alternative Assessment
Old School Way
Back in the day, teachers would decorate the bulletin boards in the hallways with cute little cut-outs, calendars, or maybe something students had colored for whatever holiday happened to be that month. I remember my third grade teacher letting us tear green paper and glue it to a coloring sheet of a shamrock to hang in the hallway for the month of March.
There is nothing fundamentally wrong with tearing paper and gluing it to a coloring sheet. It can be fun. Tearing paper is a fine motor skill that takes practice to develop.
However, this type of activity isn’t very intellectually challenging. We know much more about the human brain and how creativity works than we did twenty years ago.
New School Way
My school uses bulletin boards in the hallways to document student learning. We don’t hang anything for the sake of having it hung. Our hallways look amazing, but what is hanging there documents the process of solving creative problems.
There is a real shift in the way we use this space outside our doors that is a result of a shift in what we know about how students learn. We know there is more value in the process than in the product. The process is where the learning occurs. So, one thing that is important to include in a hallway display of student learning is a description of the process.
In this photo, the sheets labeled Ocean Animals tell briefly what steps students took to create these works. The first thing that students had to know was how to identify and use warm and cool colors. They created color wheels. A few of those are hanging to document that.
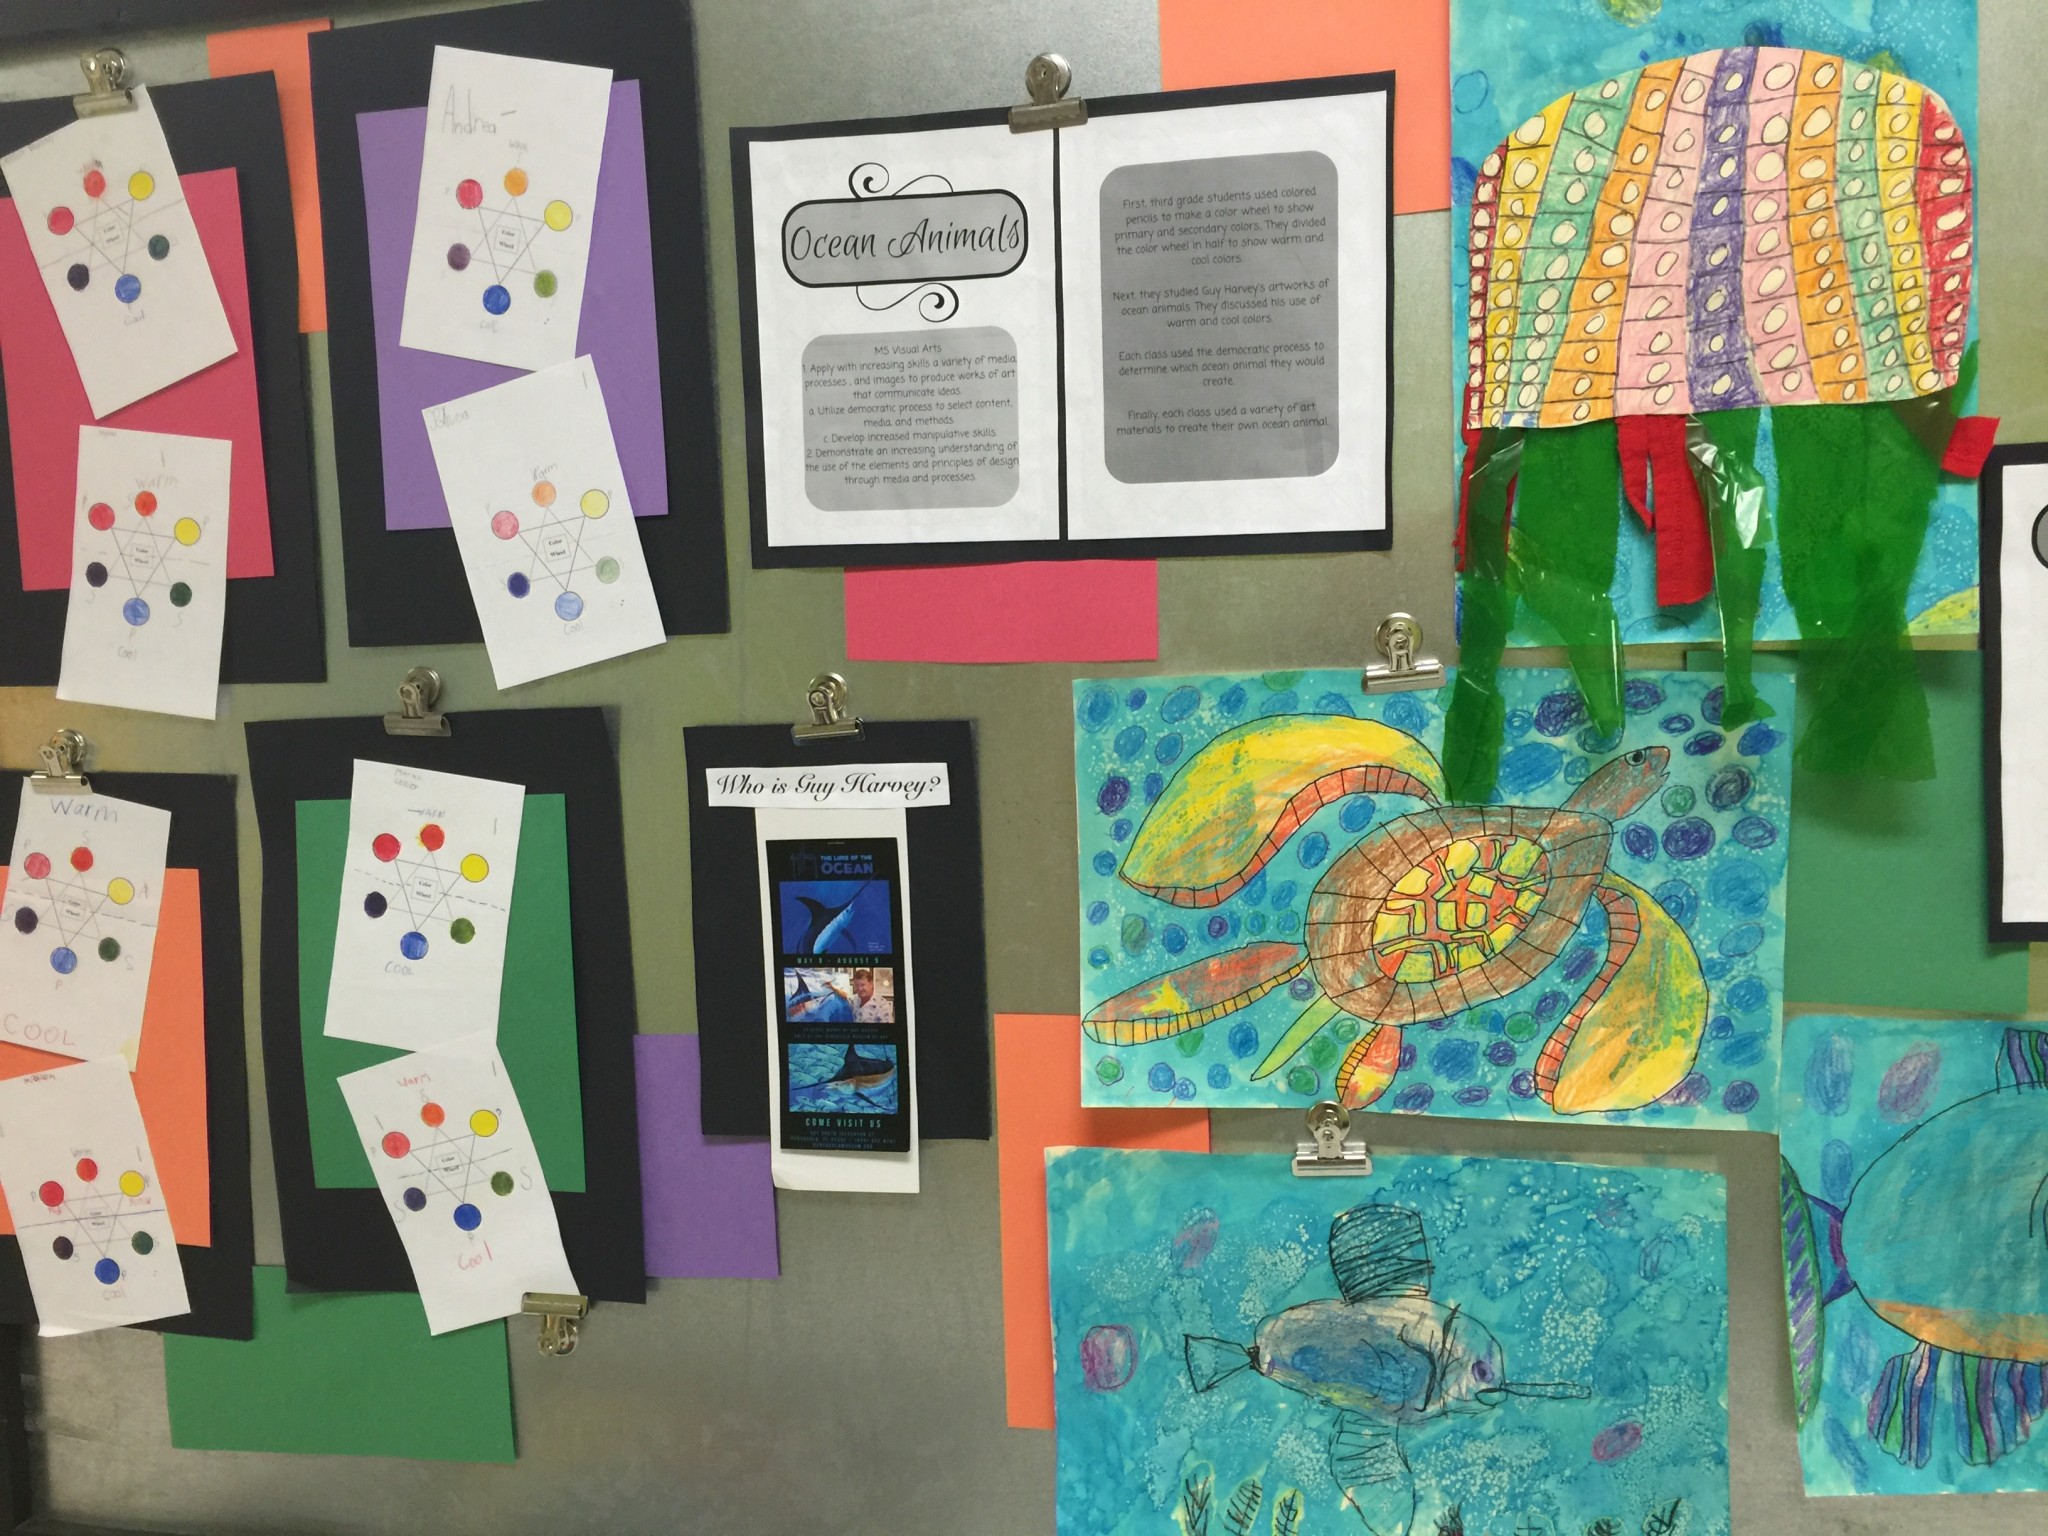
Students also viewed the works of Guy Harvey. So, they learned about ocean animals and spent some time learning about how Guy Harvey is an artist but also a scientist. They chose an ocean animal to depict through their artwork and read about it. Then, they had to make choices about warm and cool colors to create the artwork.
Authentic Student Work
The authentic student work depicted here is worth noting. This photo shows a swordfish, a sea turtle, and a jelly fish. After students chose the animal they wanted to study, they had to view the animal in videos and in photographs. They had to study the shapes of the animals. So, each student used visual discrimination and perceptive skills to draw.
This is not what as come to be called a “cookie cutter” project. The students had to use what they were learning about color theory, shape, and the animals themselves to make decisions about how to use the materials to which they were given access to depict the animal. Talk about problem solving, critical thinking, and creativity!
Displays as Teaching Tools
When students are in the hallways of my school, they can learn from these displays. For instance, every time these third graders walked down this hallway they were reminded of what they’d learned about the color wheel because the color wheels were there for several weeks as a visual reminder. When students also write about their work for display, other students can read what is written and learn from their peers.
Teachers can use these displays as a review tool as well. When I taught first grade, I would have a center in the hallway for three or four students at a time where they had to analyze the works of their peers or use them to review a skill. We have teachers at this school that will walk their classes to lunch and point out things in the hallway as they are walking. Not a minute is wasted when students are learning as they walk to lunch!
What Makes a Good Display to Document Learning
At a minimum, I would suggest listing objectives for all content addressed in the lessons on display. For instance, the display above had science, language arts, and visual arts standards addressed. Those were listed on the side of the display. Also, a description of the process should be provided so that others can understand what steps were taken in the process.
I created a sort of a la carte menu for the teachers at my school to use when deciding what to hang. I have gotten a lot of positive feedback on this and thought it might be something worth sharing.
Content Objectives: Regular Subject AND Arts
Include standards (words and numbers) and pick 1:
- I Can Statements
- Learning Targets (TSW…)
- Soft Skills (Fine Motor, Gross Motor, Social, etc.)
Authentic Work
Pick 1 that is appropriate to the lesson:
- Process photos
- Artistic products
- Products of student work related to artwork that is not attached to the actual artwork
- Drafts
Other
Include a distinct title, description of process and pick 1:
- Teacher reflection
- Quotes from students
- Essential vocabulary
- Information about the artists
- Essential or Highly Effective Question
- Images studied
- Student reflections
- Enrichment pieces
- Closure (exit tickets)
- Artist statements
The photo above is from a display that I created for student learning in my visual arts classroom. I frequently share examples of hallway documentation from other teachers over at Party in the Art Room. Feel free to check that out when you have time.
A Few Final Words
Let’s chat about this. Have you transitioned from the old school way to the new school way of hanging student work in the hallways? If not, what holds you back? I look forward to hearing from you.
P.S. Having a center in the hallway requires some serious planning and classroom management. Check out the course I developed for Education Closet called Managing an Arts-Integrated Classroom for deeper learning on managing an active learning environment.